

Ubuntu 21.04 (Hirsute Hippo)から、Active Directoryとのネイティブ統合機能が実装されました。
最近では、macOSデバイスがNVIDIA GPU搭載されないどころか、Apple Siliconに統合されていく中でDeep Learningや、Unity利用者には少し辛い状況となってきました。
Windows 10 Insider Previewをインストールすれば、WSL2でもDockerのGPUパススルー利用が可能となるので、少し選択肢は広がってきたものの、それでも企業でのLinux利用ニーズが高まってきているな、と感じます。
企業でPCを利用する際は、ガバナンスなどの観点から管理者がコントロールさせたいのが正直なところ。
そんな中、Ubuntu 21.04からctive Directoryとのネイティブ統合機能が実装されたのは朗報でしたね。
早速検証環境で試してみたので、早速設定方法を紹介していこうと思います。
本記事では既に過去に「.local」ドメインで構築されたActive Directory環境を想定して記載しております。
「.local」ドメインについては現在は非推奨であり、自身で所有しているドメインのサブドメインを使う等が主流となっておりますので、新規構築される際は「.local」ドメインのご利用は避けるようにしてください。
目次
Ubuntu 21.04のインストール

Ubuntu 21.04のインストールを進めていくと、ホスト名やユーザ名を指定するウィンドウの最下部に「アクティブディレクトリを使用する」チェックボックスが用意されているので、こちらにチェックを入れて「続ける」をクリックします。
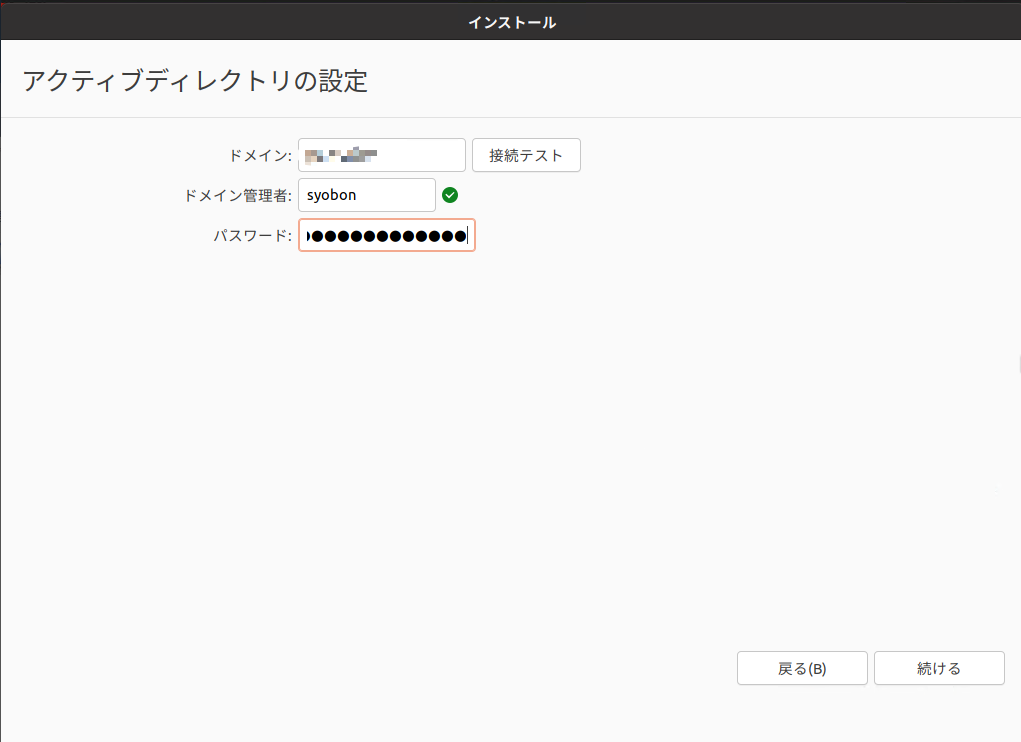
すると、「アクティブディレクトリの設定」画面が表示されるので、Active Directoryドメインとドメイン参加するための管理者IDとパスワードを指定して「続ける」をクリックします。
どうやらActive Directoryに参加させる場合、ユーザーアカウント名は参加させるActive Directoryに存在するアカウントと同一名にしなければ「アクティブディレクトリの設定」画面から先に進められなかったので、そこだけ注意が必要です。
インストール後の初期設定
Windowsデバイスであれば、ドメイン参加すればそれで完了!なのですが、Ubuntu 21.04では追加でいくつか設定を行う必要があります。
本記事ではActive Directoryのドメインをhoge.local、Active Directoryドメインコントローラーがdc-01.hoge.localとdc-02.hoge.localがある環境にubuntu-ad-test02を参加させる事を仮定して解説しています。
パッケージ準備とホスト名の追加設定
まずはインストール後のパッケージ更新と、パッケージの追加を行います。
$ sudo apt update
$ sudo apt upgrade
$ sudo apt install sssd-tools sssd-dbus
続いて、/etc/hostnameを編集し、ホスト名の最後にActive Directoryのドメインを追加して、FQDNで記載してから一旦再起動します。(例ではhostname@hoge.local)
$ sudo cat /etc/hostname
hostname@hoge.local
sssd.confの編集
続いて/etc/sssd/sssd.confを編集して、追加の設定を行います。
$ sudo vim /etc/sssd/sssd.conf
[sssd]
domains = hoge.local
config_file_version = 2

#services追加
services = nss, pam, ssh

[domain/hoge.local]
default_shell = /bin/bash
krb5_store_password_if_offline = True
cache_credentials = True
krb5_realm = HOGE.LOCAL
realmd_tags = manages-system joined-with-adcli
id_provider = ad
ldap_sasl_authid = ubuntu-ad-test02$
fallback_homedir = /home/%u@%d
ad_domain = hoge.local
use_fully_qualified_names = True
ldap_id_mapping = True
access_provider = ad

##以下追加
#Active Directoryドメインコントローラーが複数有る場合は,で分ける
ad_server = dc-01.hoge.local,dc-02.hoge.local

#ログイン時のエラー回避のため追加
ad_gpo_ignore_unreadable = True
ad_gpo_access_control = permissive
sssd.confの編集が完了したら、下記を実行してsssdを起動します。
$ sudo systemctl enable sssd
$ sudo systemctl start sssd
動作確認
Active Directoryドメインコントローラーと疎通が取れていることを確認するために下記を実行し、Active Directoryドメインコントローラー上に存在するユーザアカウントが引っ張れるか確認します。
$ getent passwd username@hoge.localActive Directoryドメインコントローラーと正常に疎通が取れている場合は、Active Directoryユーザーアカウントのpasswd情報が引っ張れるはずです。
続いて、loginコマンドを使ってActive Directoryドメインコントローラー上のユーザーアカウントでログインできてかつ、ユーザーディレクトリが作成されることを確認します。
$ sudo login username@hoge.local

admin@ubuntu-ad-test02:~$ sudo login
ubuntu-ad-test02.hoge.local login: username@hoge.local
パスワード:
Welcome to Ubuntu 21.04 (GNU/Linux 5.11.0-16-generic x86_64)

 * Documentation:  https://help.ubuntu.com
 * Management:     https://landscape.canonical.com
 * Support:        https://ubuntu.com/advantage


The programs included with the Ubuntu system are free software;
the exact distribution terms for each program are described in the
individual files in /usr/share/doc/*/copyright.

Ubuntu comes with ABSOLUTELY NO WARRANTY, to the extent permitted by
applicable law.


The programs included with the Ubuntu system are free software;
the exact distribution terms for each program are described in the
individual files in /usr/share/doc/*/copyright.

Ubuntu comes with ABSOLUTELY NO WARRANTY, to the extent permitted by
applicable law.

ディレクトリ '/home/username@hoge.local' を作成中
username@hoge.local@ubuntu-ad-test02:~$
グラフィカルログインする方法
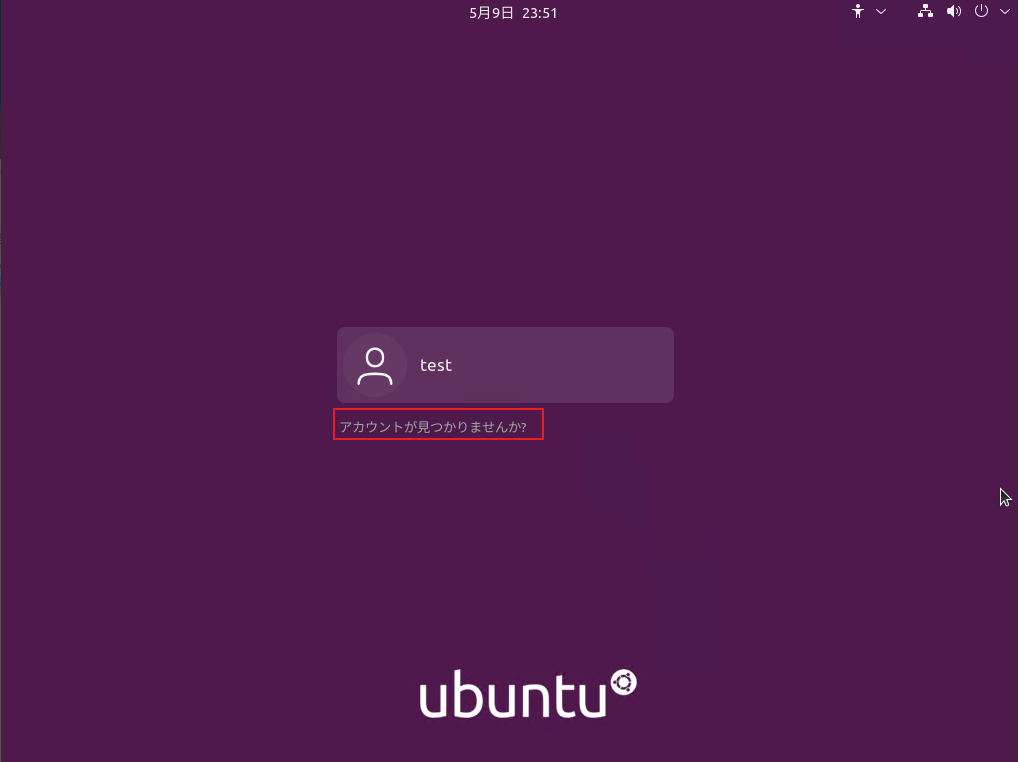
Active Directoryドメインコントローラー上のアカウントでログインする場合は、ログイン画面の「アカウントが見つかりませんか?」をクリックします。
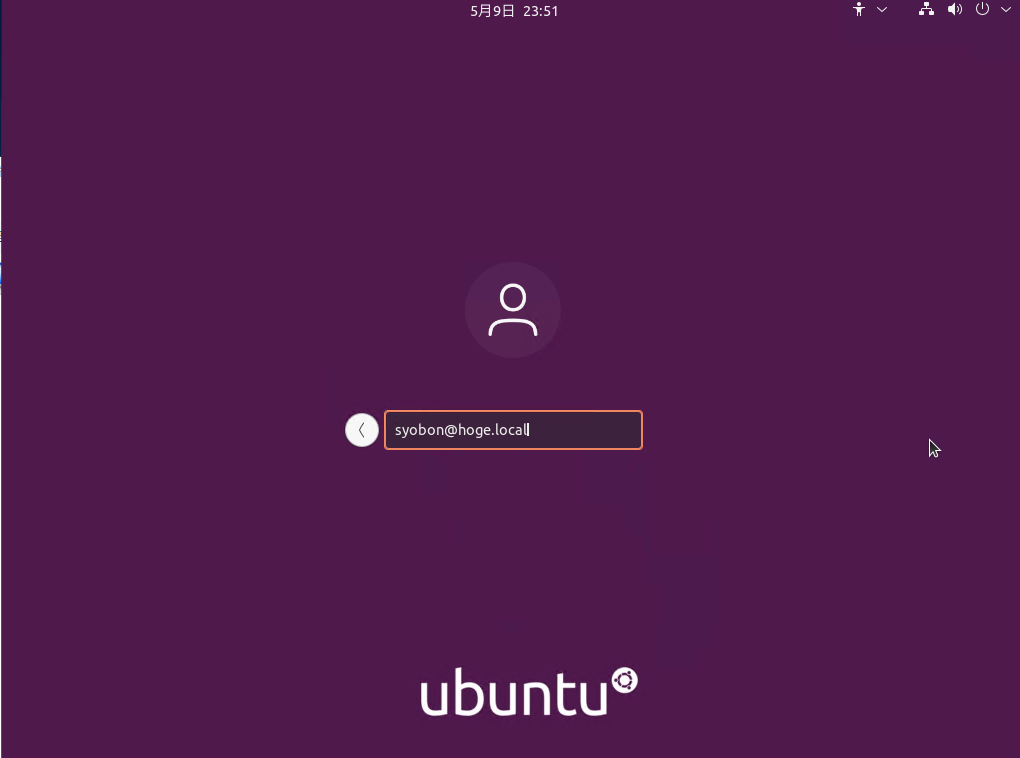
ユーザーアカウントを入力できるようになるので、<username>@<domain>の形式で入力してEnterを押下します。(例ではsyobon@hoge.local)

はじめてログインする際は、上図の通り「ディレクトリ’/home/<username>@<domain>を作成中」と表示され、しばらくしたらログインできるようになります。
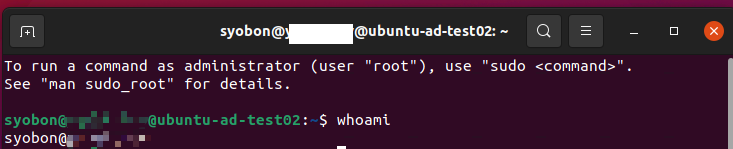
コンソールを立ち上げ、「whoami」を実行すると、<username>@<domain>の形でアカウントが作成されます。
ホームディレクトリも/home/<username>@<domain>という形で作成されます。
CLIでsshログインする際のID表記について
Active Directory参加したUbuntu 21.04マシンに対し、Active Directoryのユーザアカウントでログインする際は下記の様に記載します。
#ssh <username>@<domain>@<hostname>
ssh username@hoge.local@ubuntu-ad-test02.hoge.local
ユーザー名やホームディレクトリにドメイン名を追加しない方法
基本的には、上記の設定だけで問題なく利用できるとは思いますが、ユーザー名やホームディレクトリ追加しない(FQDNを使用しない)ようにするには、/etc/sssd/sssd.confを下記の様に変更します。
$ sudo vim /etc/sssd/sssd.conf
[sssd]
domains = hoge.local
config_file_version = 2

#services追加
services = nss, pam, ssh

[domain/hoge.local]
default_shell = /bin/bash
krb5_store_password_if_offline = True
cache_credentials = True
krb5_realm = HOGE.LOCAL
realmd_tags = manages-system joined-with-adcli
id_provider = ad
ldap_sasl_authid = ubuntu-ad-test02$
#fallback_homedirから@%dを消す
fallback_homedir = /home/%u
ad_domain = hoge.local

#use_fully_qualified_namesをFalseにする
use_fully_qualified_names = False
ldap_id_mapping = True
access_provider = ad

##以下追加
#Active Directoryドメインコントローラーが複数有る場合は,で分ける
ad_server = dc-01.hoge.local,dc-02.hoge.local

#ログイン時のエラー回避のため追加
ad_gpo_ignore_unreadable = True
ad_gpo_access_control = permissive
UbuntuにActive Directoryアカウントでログインできるのは結構便利
実際に検証してみると、割とすんなりとActive DirectoryアカウントでUbuntuにログインできてビックリ。
ドメインコントローラーへのリーチャビリティが必要であるものの、ローカルアカウントではなく、Active Directoryアカウントを利用できるという点は企業での利用にはかなりありがたいなぁと。
組織で設定したパスワードポリシーに準拠したアカウントで統一できますし、今回検証に至っていませんがGPOでの管理もできるようになるのは管理者側からすると結構ありがたいところ。
今回はあまり時間が無かったので、基本的なところの解説に留めてしまいましたが、もう少し触ってみて追加で分かったことがあればまた記事にしようかと思います。
お手元に検証できる環境がある方はぜひ試してみてくださいね。
参考元